


Text Recognition or Optical Character Recognition (OCR) is an electronic and mechanical way to convert typed, handwritten or printed text into machine-encoded code (elaborate more about OCR for example).
Tesseract is an open-source OCR engine initially developed by HP and was released as open-source software in 2005 and was sponsored by Google in 2006.
Tesseract Implementation in Python
For our implementation, we are going to use a python wrapper for tesseract known as Pyteseract. There are other wrappers of tesseract available for different languages which can be found here. We can install it using pip install pytesseract.
We can start it with reading the image and converting it into a NumPy array using the OpenCV function imread as shown in the image below.

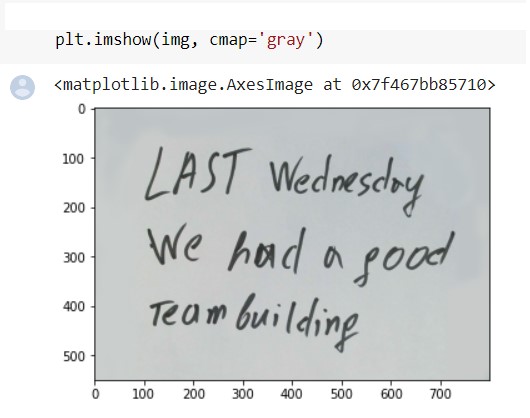
We can also check the image if it’s correctly readed or not using matplotlib function imshow.
We have readed the image and now we have the image in the form of an array showing pixel values. Now we have to process the information using tesseract using the function image_to_string which has google tesseract pre-trained models. We can use pytesseract with default configurations or with our own configuration.
For default configuration we just need to pass the image array to function as shown below.

For our own custom configuration we can set the input language, OEM (OCR engine mode), page segmentation.
- Language: We can set our tesseract model to detect from single or multiple languages. We can set different language configurations using -l eng argument.
- OEM (OCR engine Mode): We can set different OCR modes with this configuration. Currently in Tesseract 4 there are 4 modes available
- 0 Legacy Engine
- 1 Neutral nets LSTM engine only
- 2 Legacy + LSTM engines.
- 3 Default, based on what is available.
We can try different OEM configuration using –oem 3 argument
- Page Segmentation: We can adjust different page segmentation according to our text for better results. Currently in Tesseract 4 following page segmentations are available
- 0 Orientation and script detection (OSD) only.
- 1 Automatic page segmentation with OSD.
- 2 Automatic page segmentation, but no OSD, or OCR.
- 3 Fully automatic page segmentation, but no OSD. (Default)
- 4 Assume a single column of text of variable sizes.
- 5 Assume a single uniform block of vertically aligned text.
- 6 Assume a single uniform block of text.
- 7 Treat the image as a single text line.
- 8 Treat the image as a single word.
- 9 Treat the image as a single word in a circle.
- 10 Treat the image as a single character.
- 11 Sparse text. Find as much text as possible in no particular order.
- 12 Sparse text with OSD.
- 13 Raw line. Treat the image as a single text line, bypassing hacks that are Tesseract-specific.
We can try different page segmentation using –psm 3 argument.
The following example demonstrates setting custom configuration for our model.

Results of model:
We have run our model with default configurations and have fetched the following results.
Input Image

Output text:

We can achieve better results with better pre-processing but there are also few limitations of this model i.e. we can’t train it on our own dataset for better results.
Pros and Cons of Tesseract
Pros
● Support for 40 languages
● Very easy to use (see the manual page, not built-in help)
● Works great with 300 DPI files
● Open source and had different wrappers for different programming languages
Cons
● Rudimentary image processing
● Not good results with tilted text
● Not good results with sharp and bright images
● Not good with stylish handwritten text
Software Engineer