As previously we had seen how Text Recognition works with the Tesseract Model. In this blog we are going to look at another approach for Text Detection Using OpenCV and EAST: An Efficient and Accurate Scene Text Detector.
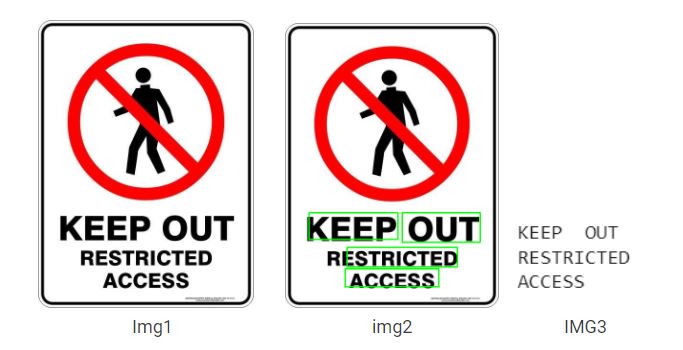
Before starting we should know the difference between Text recognition and Text detection. In text detection we only detect bounding boxes around the text in the image whereas in text recognition we find out what is written inside the box. For e.g in img2 we can clearly see the boxes around the text which is an example of text detection. Whereas img3 which displays the exact text is an example of text recognition.


Text recognition engines like tesseract require bounding boxes around the text before text recognition for better performance.
EAST Implementation in Python:
- Download the EAST model named (frozen_east_text_detection) from GitHub
Note: EAST model require image dimensions (width, height) in multiple of 32
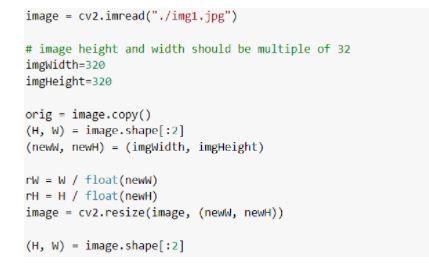
Import the image and perform the pre-processing step to resize the image to multiple of 32.

Now we need to load the network in the memory. For that we would use cv2.dnn.readNet() function by passing an EAST detector as an argument which will automatically detect the framework based on file type. In our case it is a pb file so it will automatically load Tensorflow Network.
Demo Page:

- We now need to create the image to blob using cv2.dnn.blobFromImage() function. The parameter of this function are as follow:
- The first argument is the image that we need to convert.
- The second argument is scale factor. Using this argument we can optionally scale our image to some factor. The default value is 1 that means no scaling.
- The third argument is the size of the network which is by default 320×320.
- The fourth argument is the mean which is the mean subtraction value which is in the form of a tuple of RGB which is subtracted from that channel.
- The fifth argument is swapRB which is used to swap R and B channels in the image if it is set is true.
The last argument is crop which states whether we want to crop the image or not.

The first layer is sigmoid activation which will give us the probability (confidence score) of the presence of text in a particular area.
The second layer defines the geometry of the bounding boxes of the text area.

Now we will set the blob as an input for the network using the setInput() function and call forward() function to predict the text. In the forward() function we will pass the layers as an argument to instruct openCV to return the output features that we are expecting. The output features are as follow:
The geometry of the bounding boxes around the text.
The confidence score of the bounding boxes.
Now we will loop through each value in scores and geometry. And create the bounding boxes and their confidence score and store it in rects and confidence lists.
rects will store bounding boxes coordinates
confidence will store the probability of that bounding box
While doing that we will also filter out weak text detection by ignoring them if their confidence score is less than our set probability.
In our next step we will suppress the weak overlapping bounding box using non_max_suppression() of imutils.
- In this step we will scale our image back to original size and create the bounding boxes in the image.


Conclusion:
As clearly shown by the result of this model, it was able to detect text from images with different backgrounds, fonts, size and text orientations. But we also also see some undetected text also, but overall performance of this model is very good.
There could be different applications for this model. It can be used for road side sign detection, Number Plate detection and many more.
You can access complete code and EAST model from the following GitHub repository .

Software Engineer


