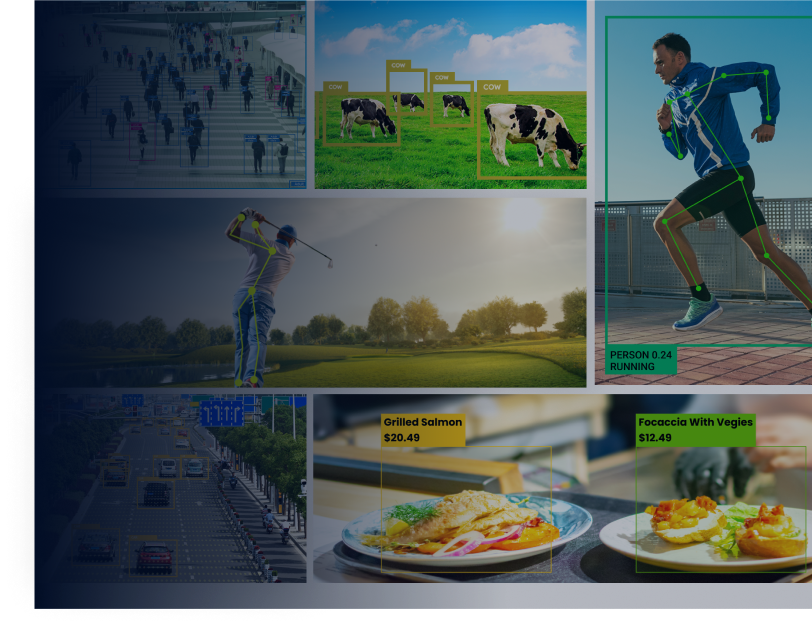
Evenmore computer vision applications in the AI era require 2D human pose estimates as data input. This also includes picture identification and AI-based video analytics as follow-up tasks. Pose estimation for single and multiple people is a common computer vision task that can be applied to a variety of applications, including action identification, security, sports, and more.
OpenPose is a genuine multiple-person detection library that is the first to demonstrate the ability to recognise human body, face, and foot key points simultaneously.
Pose estimation is a relatively young field in computer vision. However, with the advent of Convolutional Neural Networks, human pose estimate accuracy has improved dramatically in recent years (CNNs).
What is the OpenPose artificial intelligence software?
OpenPose is a real-time multi-person human pose recognition library that has successfully detected the human body, foot, hand, and facial keypoints on single photos for the first time. A total of 135 key points can be detected by OpenPose.
The approach won the COCO 2016 Keypoints Challenge and is well-known for its good quality and adaptability to multi-person scenarios.
Who is the founder of OpenPose?
Ginés Hidalgo, Yaser Sheikh, Zhe Cao, Yaadhav Raaj, Tomas Simon, Hanbyul Joo, and Shih-En Wei invented the OpenPose technique. Yaadhav Raaj and Ginés Hidalgo, on the other hand, keep it up to date.
What are OpenPose’s 2D and 3D features?
The OpenPose human posture detection library includes numerous features, but the following are a few of the more noteworthy:
- 3D single-person keypoint detection in real time
- Multiple camera angles for 3D triangulation
- Camera compatibility with Flir
- 2D multi-person keypoint detections in real time
- Estimation of 15, 18, and 27-keypoint body/foot keypoints
- Estimation of 21 keypoints by hand
- Estimation of 70 facial keypoints
- Single-person tracking to speed up recognition and smooth out the visuals
- Extrinsic, intrinsic, and distortion camera parameters are estimated using a calibration toolkit.
How to identify pose estimation with openpose keypoints?
A based image skeleton represents an individual’s orientation in a certain structure. It’s essentially a collection of data points that can be combined to characterize a person’s pose. Each skeletal data point is also known as a part, coordinate, or point. A limb or pair is a significant link between two coordinates. It is crucial to remember, however, that not all data point combinations result in useful pairs.
Knowing a person’s orientation opens the door to a plethora of practical uses. Over the years, many methods for estimating human pose have been proposed. The first technique typically approximated the stance of a single person in a single-person photograph. OpenPose is a more adaptive approach to pose estimation that may be used on photos with cluttered scenes.
Openpose tutorial for noobs – how to use openpose in 3 best ways?
Following are the best three ways to use openpose.
1. Lightweight OpenPose
Pose Estimation algorithms typically demand a lot of computing power and are based on huge models with a lot of data. As a result, they are inappropriate for real-time applications (video analytics) and implementation on systems with limited resources (edge devices in edge computing). As a result, lightweight real-time human pose estimators that can be deployed to devices for on-device edge machine learning are required.
Lightweight OpenPose is an OpenPose implementation that does real-time inference on the CPU with minimal accuracy loss. It determines human poses for each individual in the image by detecting a skeleton made up of keypoints and the connections between them. The ankles, ears, knees, eyes, hips, nose, wrists, neck, elbows, and shoulders may all be included in the position.
2. Camera and Hardware
OpenPose accepts video input from webcams, Flir/Point Gray cameras, IP cameras (CCTV), and custom input sources such as pictures, movies, and camera streams (such as depth cameras, stereo lens cameras, etc.)
In terms of hardware, OpenPose supports Nvidia GPU (CUDA), AMD GPU (OpenCL), and non-GPU (CPU) computation. Ubuntu, Windows, Mac OS X, and the Nvidia Jetson TX2 are all supported.
3. The best way to use OpenPose?
OpenPose’s official installation guide may be found here. Here are some tutorials for utilizing the Lightweight implementation version.
Viso Suite, an end-to-end computer vision platform that delivers everything out of the box, is arguably the quickest and easiest option to use OpenPose. OpenPose may be used with a variety of cameras and AI devices thanks to the Viso Platform.
How Does OpenPose Github API Library Works in 5 steps?
Using the first few layers, the OpenPose library extracts features from a photo. The collected characteristics are then fed into two convolutional network layer divisions that run in parallel. The first segment forecasts a set of 18 confidence maps, each of which represents a different portion of the human posture skeleton. The next branch predicts 38 Part Affinity Fields (PAFs), which indicate the degree of affinity between parts.
The later steps are used to clean up the branches’ forecasts. Bipartite graphs are created between pairs of parts using confidence maps. Weaker linkages in bipartite graphs are trimmed using PAF values. Now that all of the stages have been completed, human posture skeletons may be evaluated and assigned.
- Use the complete image as an input
- A two-branch CNN that predicts confidence maps for body part detection in tandem
- For parts association, estimate part affinity fields
- A set of bipartite matchings to link candidates for bodily parts
- Put them together in full-body positions for all of the persons in the image.
Key Differences between OpenPose vs. Alpha-Pose vs. Mask R-CNN
OpenPose is a well-known bottom-up approach for estimating multi-person body poses in real time. One of the reasons is that their GitHub implementation is well-written. OpenPose, like the other bottom-up techniques, begins by detecting keypoints that belong to every person in the image, then assigning those key points to specific individuals.
Alpha-Pose vs. OpenPose
RMPE, also known as Alpha-Pose, is a well-known top-down post-estimation approach. Top-down approaches, according to the authors of this technology, are usually based on the precision of the person detector, because posture estimate is done on the area where the person is present. This is why the pose extraction method may perform sub-optimally due to inaccuracies in localization and repeat bounding box predictions.
The developers devised a Symmetric Spatial Transformer Network (SSTN) to extract a high-quality human region from an erroneous bounding box in order to address this issue. In this extracted area, a Single Person Posture Estimator (SPPE) is used to calculate the human pose skeleton for said individual. To remap the human position back to the original picture coordinate system, a Spatial De-Transformer Network (SDTN) is used. To deal with the problem of irrelevant pose deductions, the authors have devised a parametric pose Non-Maximum Suppression (NMS) approach.
A Pose Guided Proposals Generator has also been proposed to help better train the SPPE and SSTN networks by multiplying training samples. Alpha-most Pose’s notable characteristic is that it can be expanded to any combination of a person detection algorithm and an SPPE.
Mask R-CNN vs. OpenPose
Finally, the Mask R CNN architecture is a well-known architecture for semantic and instance segmentation. It predicts both the bounding box positions of the various objects in the image, as well as a mask that conceptually segments the objects (image segmentation). Mask RCNN’s architecture may easily be adapted to estimate human pose.
A convolutional neural network extracts feature maps from a picture first (CNN). These feature maps are used by a Region Proposal Network (RPN) to generate bounding box candidates for the presence of entities. Candidates for the bounding box select a region from the feature map. The RoIAlign layer is used to reduce the size of the extracted features because the bounding box candidates can be of varying sizes.
The collected features are now fed into the parallel branches of CNNs, which will predict the bounding boxes and segmentation masks in the end. Individuals’ regions can be determined using an object detection algorithm that has been trained. We can derive the human pose skeleton for each individual in the image by combining the person’s position information and their set of keypoints.
This method is identical to the top-down method, except that the person detection phase is performed concurrently with the part detection stage. To put it another way, the keypoint detection phase and the person detection phase are separate processes.
Folio3 is your best computer vision tech partner
Folio3 provides specialist Computer Vision services and solutions to help you get a head start on your AI lifecycle by converting unstructured data into clear actionable analytics and insights. Use the power of AI to turn your Big Data into a source of profitable growth for your company.
We provide comprehensive Computer Vision services and solutions for a wide range of scenarios and industry verticals. We assist businesses in quickly implementing AI solutions, accelerating their AI lifecycle, and gaining long-term competitive benefits.
Folio3 also offers pre-built computer vision models that are designed to solve certain challenges, allowing you to spend less time in the design phase and more time on training and deployment. Unstructured picture and video data can be transformed into crucial insights using specialized solutions and services.
What is the difference between face, hand and pose models in openpose?
How to normalize openpose output?
How to install openpose library?
Install the following prerequisites:
Install all of the prerequisites for the demo.
Python 2.4.13 64-bit MSI installer for Windows x86-64.
It should be installed on C:Python27 (the default) or D:ProgramsPython27. Otherwise, make the necessary changes to the VS solution.
Additionally, open the Windows cmd (Windows button + X, then A) and run the following command to install some Python libraries: pip Numpy protobuf theory should be installed
Select the option to add it to the Windows PATH when using Cmake.
Ninja: Choose to add it to the Windows PATH environment variable.
Microsoft Visual Studio 2015.
Download the Windows branch of Openpose by either clicking on Download ZIP on openpose/tree/windows or cloning the repository: git clone https://github.com/CMU-Perceptual-Computing-Lab/openpose/ && git checkout windows.
Open the Windows cmd (Windows button + X, then A) to install Caffe.
If OpenPose has been downloaded to C:openpose, navigate to the Caffe directory by typing cd C:openpose3rdpartycaffecaffe-windows.
Run scriptsbuild win.cmd to compile Caffe. It will take a long time.
If Caffe asks if D:openpose3rdpartycaffecaffe-windowsbuild…..includecaffe specifies a file or directory name on the target (F = file, D = directory), choose D.
Check http://caffe.berkeleyvision.org/ if you have any problems installing Caffe.
You can now access the Visual Studio sln file OpenPose.sln, which is located at openpose pathwindows project.sln.
Try compiling and executing the example to see whether OpenPose is working:
Set as StartUp Project by right-clicking on OpenPoseDemo.
Switch from Debug to Release mode.
It’s now ready to be compiled.
Models of body poses can be downloaded here:
Openpose foldermodelsposecocopose iter 440000.caffemodel to download the COCO model (18 key points).
Download the MPI model as openpose foldermodelsposempipose iter 160000.caffemodel (15 key-points, faster and less memory than COCO).
If you have a webcam attached, press the F5 key or the green play symbol to test it.
Otherwise, ensure that OpenPose was properly compiled using Quick Start. To run the produced exe from the command line, do the following:
All DLLs from openpose folder3rdpartycaffecaffe-windowsbuildinstallbin should be copied to the exe folder: openpose folderwindows projectx64Release.


